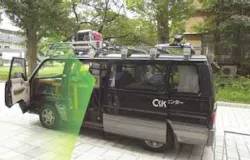
Laser sensor spots cars and other street objects
TOKYO—Researchers at the Ikeuchi Laboratory of the University of Tokyo Institute of Industrial Science have developed an automobile recognition system that uses laser range sensors. Mounted on a moving car, the system can recognize and count parked cars in real time. The device may be commercialized as early as 2003. Possible uses range from recognizing parked cars to recording three-dimensional (3-D) information in general, including road conditions and landmarks.
Until now, monitoring cars parked on the street required active human involvement: a traffic officer would count cars and enter the number into a handheld counter while being driven around a particular neighborhood by another person. A commercialized version of the new laser-ranging system would be able to record 3-D information on traffic conditions and, with additional features such as a global positioning system, speed-detecting pulse, and gyroscope, would also be able to map detailed position information. In addition, it could determine the make of the cars based on the 3-D data. Such information on general street conditions has not been easily available thus far.
The system emits signal pulses from a semiconductor laser, then measures the time lag as the signal propagates to determine the distance to the object. An 870-nm-emitting laser scanning at a maximum rate of 120 scans/s is used to measure distances ranging from 2 to 50 m. The device is mounted on a car that passes by the object, so information can be gathered from the entire object (see figure). The information is reconstructed into 3-D data. Based on the information it captures, the system can count and store the total number of cars within a region, as well as calculate what percentage of the sites are occupied.
In the past, charge-coupled-device cameras were used to recognize and count parked cars. However, because of the harshness of outdoor light, as well as extreme shadows, measurements were extremely difficult. In addition, the image processing took over an hour just to recognize a few cars. In contrast, the laser-scan method is dynamic and is not influenced by the condition of the road or the color of the cars. The computer processing time is only a few hundred microseconds per car. When mounted on a car moving at 20 km/h, 100% of parked cars can be detected. The laser is a Class 1 laser, so there are few safety concerns.
null
This system can detect things like trees and guard rails that are not included in conventional 3-D digital maps. In addition, it can be used to measure and record the difference in height between sidewalks and roads, thus aiding the elderly and the mobility impaired. It could also help monitor on-street parking violations. Instead of having parking officers check cars one by one, a moving police car can detect when a car is illegally parked. If an automatic, mobile method of ticketing could also be incorporated, the task of overseeing parking violations could be greatly simplified.
Courtesy O plus E magazine, Tokyo
3-D probe to measure aspheric lenses
TOKYO—Matsushita Electric Industrial has developed a three-dimensional (3-D) measurement device that can make ultrahigh-accuracy measurements of objects up to 400 ¥ 400 ¥ 90 mm with nanoscale accuracies of 10 nm. Even tiny corners with a radius on the order of 2 µm can be probed. An atomic-force probe is used in this device, along with a distance-measuring interferometer. Such probes use the response forces between atoms, which take effect when the probe is within about a nanometer of the object. The probe is moved across the specimen surface and the change in force measured.
Standard probes are made of ruby and have a radius of curvature of 0.5 mm. Ruby probes cannot enter small corners or crevices, making nanoscale measurements of such features impossible. This Matsushita device uses a diamond stylus with a 2-µm radius and a 45º apex angle, making possible the measurement of both corners and crevices.
The probe is controlled by a feedback mechanism that responds rapidly to changes in the surface topology. A 3-D coordinate-measurement system based on a He-Ne laser interferometer measures the probe position to an accuracy of 10 nm. The research team expects the device to enable the testing and measurement of aspheric lenses for next-generation large-capacity optical disks and fiberoptic communications components.
Courtesy O plus E magazine, Tokyo


