Hold up, LiDAR hasn’t reached its performance limits
Industrially available optical metrology techniques are usually based on interferometry or light detection and ranging (LiDAR). Interferometry makes measurements on the scale of the laser wavelength and has nanometer-level resolutions. But it’s limited in range and can usually only measure displacement from a predefined point, rather than an absolute distance.
Conversely, time-of-flight LiDAR can measure absolute distances, but is limited to millimeter-level resolutions. This means there’s a gap in the market for an optical metrology tool that measures the absolute distances with sub-millimeter resolutions.
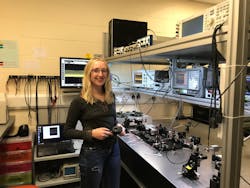
“Back in 2009, Ian Coddington and others introduced dual-comb metrology—a combination of interferometry and time-of-flight measurements,” says Hollie Wright, a research associate at Heriot-Watt University in Scotland (see Fig. 1). “Their work demonstrated high-precision absolute distance measurements at rapid update rates, and generated a lot of interest and inspired a number of publications based on the technique. But the technique was quite complex and struggled to be embraced as an industrial tool.”
Dual-comb metrology for industrial applications
Wright’s engineering doctorate project was to develop dual-comb metrology as an industrial application.
Her technique is similar to time-of-flight LiDAR in that the researchers measure the time-of-flight of laser pulses bouncing off a target to determine the range to the target. “The performance of conventional time-of-flight LiDAR is limited by the timing resolution of state-of-the-art detectors, which is what’s limited LiDAR to millimeter-resolutions so far,” she says.
Conversely, dual-comb metrology involves sending pulses from a “probe” laser to reflect off the target and then, before detection, the pulses are gated with pulses from a local oscillator (LO) laser at a slightly different repetition rate so they detect the cross-correlation of the two pulses.
“Combining the pulses from the two lasers in this way means the true time-of-flight is magnified by a factor between 20,000 and 400,000 in our system,” Wright says. “So despite being limited to the same state-of-the-art detectors, we can make much higher-resolution measurements. We’ve demonstrated 17 µm single-shot precision and, with averaging, demonstrated sub-100-nm precision within 3 seconds.”
A few tweaks
They’ve made a few tweaks to Coddington’s original demonstration to help prepare dual-comb metrology for industrial applications.
“In Coddington’s original demonstration, the probe and LO pulses were combined coherently so that the detector collected interferograms,” explains Wright. “The interferograms were digitized with expensive high-bandwidth digitizers sampling at 10 MSa/s, for example, and then usually post-processed to extract the distance measurement.
Instead, Wright combines the probe and LO pulses incoherently, and collects via two-photon absorption to directly detect carrier-free intensity cross-correlations. These carrier-free, sharply nonlinear cross-correlations are then passed through homemade electronics circuits to turn them into 5 V square pulses that can be received by a microcontroller.
They use “a teensy Arduino microcontroller to record the timing separations between the arrival of cross-correlations,” Wright says. “This change massively simplifies the technique because it reduces cost, minimizes the large data burden associated with the digitizer, and enables real-time measurements (as opposed to post-processing of the data).”
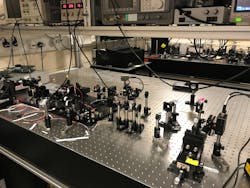
Furthermore, they did the demonstration with erbium fiber lasers, which helps make the system suitable for industry (see Fig. 2). Erbium fiber lasers can be made eye-safe, and are relatively inexpensive because they’re made with fiber components widely available from the telecom industry. These fiber lasers also enable use of silicon detectors, which are relatively cheap compared to other detectors.Despite the simplifications she’s made to the technique, such as swapping the digitizer for an Arduino to enable real-time measurements, Wright hasn’t seen any degradation in performance. “Our results are comparable to other publications about the technique,” she says. “This is very exciting and opens up opportunities for lots of different applications.”
For now, Wright’s working on optimizing the technique, but will soon start exploring potential applications. “We have lots of exciting ideas and some potential collaborators who are interested in testing out our technique in industrial environments,” she says.
RELATED READING
H. Wright, J. Sun, D. McKendrick, N. Weston, and D. T. Reid, Opt. Express, 29, 37037–37047 (2021); https://doi.org/10.1364/oe.434351.
About the Author
Sally Cole Johnson
Editor in Chief
Sally Cole Johnson, Laser Focus World’s editor in chief, is a science and technology journalist who specializes in physics and semiconductors.


