Specimen testing
International stainless steel company uses laser processing for quality assurance
Rainer Nurkkala
Outokumpu Stainless, with 8000 employees, operates in approximately 30 countries. The modern Tornio plant in Finland employs about 2500 people and produces austenitic and ferritic stainless steel products with a capacity of 1.4 million tons annually. The R&D center at the Tornio plant employs 120 professionals and focuses on stainless steel process development by improving the quality of production processes.
Laserplus Oy has taken the initiative to help Outokumpu Stainless in Tornio to automate specimen manufacturing for material tests. A laser processing system is a part of the quality assurance process that Laserplus Oy developed to combine marking, cutting, and sorting functions within the automated specimen manufacturing line.
The automated specimen manufacturing system (ASMS) was developed especially for the manufacturing of metals specimens. Using the latest laser technologies, the ASMS enables the manufacturing of test specimens faster and more profitably than manual methods. The ASMS process includes automatic test sheet loading, test sheet identification, laser marking, laser cutting, sorting of specimens, and scrap removal phases. The totally integrated automation is controlled with the product information database as a part of the quality assurance process. Based on the modular design, the ASMS handles stainless, carbon steel, and aluminum products including hot and cold rolled strip coils, plates, and sheets with various capacity requirements. Laserplus Oy has delivered the first stainless steel application of the ASMS where it operates unmanned in production at the Tornio plant.
Material testing is an essential part of the manufacturing process in the steel industry. The physical properties of the material are tested to ensure that the manufacturing process meets the standards and customer requirements. Stainless steel contains at least 10.5 percent chromium and other metals will be added to the steel. Materials with different alloy types and grades will have different properties, and it is therefore important to test all physical properties by using test machines and instruments.
In the steel industry each coil has to be tested. Test plates from different production lines are brought to the laboratory where specimens are manufactured. Test results of the material for the quality assurance management are obtained by using test specimens in different material tests. Based on the material test results, the quality assurance management provides the material certificate to the customer before shipping the coil. The steel industry has been looking for more cost-effective and less labor-intensive ways to manufacture specimens for material testing.
Specimen manufacturing
Manufacturing large quantities of the specimen requires a lot of manpower and machining tools. When manufacturing specimens manually, the test pieces are cut with a shear and machined with CNC milling machines. Material tests require various specimen shapes and CNC machining tool operations are not the most flexible tools to machine these different shapes. The combination of manual cutting and CNC machining also does not provide the test material tracking for individual specimens. With this method the test material tracking is possible only for individual test sheets.
Improved specimen manufacturing
The improved method to manufacture specimens is to use laser technology, first to automate the manufacturing phases and second to integrate the automated laser system for the entire quality assurance process. The immediate advantage of using laser cutting technology is that CNC machining is not required for test sheet thicknesses less than 3 mm. Above 3mm thicknesses, according to certain standards, the edges of the specimen can still be surface treated with milling machines.
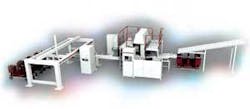
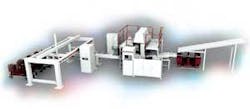
The automated specimen manufacturing system provides the individual specimen tracking functionality for the quality assurance personnel. The tracking is implemented by reporting, for example, specimen production rates, unexpected situations in specimen production, or specimen marking and cutting times. By following up the information available in reports the quality assurance personnel are able to control the entire quality assurance process. The system (see Figure 1) reduces also the manpower requirements for the specimen manufacturing.
Integration into the quality assurance process of the manufacturing plant is implemented with the information management system. The non-contact laser processes are fast and precise. High repeatability in specimen cutting tolerances ensures reliable tensile test results. Clear and machine vision readable laser marking (including text, logo, 2D-code, raster) provides individual traceability for test specimens. Operator intervention is minimized, which improves manufacturing accuracy and prevents the possibility of human error in the specimen manufacturing. Laser technology also improves the recycling of the test material by reducing actual material losses.
A laboratory is able to receive straight and flat specimen for tensile testing. The geometry of the specimen is symmetrical, because machining jigs and re-clamping are not required. The laser process, without CNC machining, does not cause strain hardening and an increase in the grain size of the specimen material. By laser cutting, the heat-affected zone or thermal effects are minimized and damage to surrounding areas of the workpiece is prevented. Laser technology provides the flexibility to manufacture multiple test sample geometries. The laser cell control system selects the specimen geometries either in automatic mode from the database or manual mode from the pre-programmed macros. The manufacturing system allows the rotation of the specimen geometry (for example 45 or 90 degrees) relative to the rolling direction.
System operation
As shown in Figure 2, the ASMS specimen manufacturing process includes test sheet loading, identification, laser marking, laser cutting, specimen sorting, and scrap removal phases. After loading the test sheet into the entry section of the ASMS, the barcode is identified from the test sheet. Simultaneously the specimen manufacturing information is downloaded from the production database into the ASMS system. After the identification phase and prior to laser marking, the width, length, and thickness of the test sheet is measured. The specimen data is downloaded as a set up to the ASMS database together with the plant production data and the measured data. The set up of the test sheet contains marking data and different geometries and quantities of specimens. Typically a test sheet includes from three to ten specimens. The software decides the specimen nesting positions based on production database and measurement information. The specimens are nested into the test sheet based on customer and standard (for example, DIN) requirements of the material tests and on the marking and cutting requirements.
The laser marking of the specimen follows the set up from the plant production database. The marking of the specimen and cutting positions are coordinated with each other. The laser cutting is implemented with two cutting heads. The thickness of the test sheet can vary from 0.5 mm up to 12 mm. Selection of the cutting head and parameters are based on the test sheet thickness. The completed specimens are sorted according to the specimen type into the sorting table boxes. In addition to the automatic manufacturing of specimens, the system has several special or manual functions. When necessary the test sheets can be stored for further research after cutting to the special pallet. Test sheets can also be loaded manually into the system without automatic sheet loading function direct to laser marking and cutting sections. The manual nesting is also possible direct from the sheet pallets. The free programmable shapes can be marked in the manual mode.
Engineering practices
During the project implementation Laserplus Oy engineering practices followed Outokumpu Stainless engineering standards. Mechanical engineering is based on 3D modeling, and all the linear movements were analyzed virtually before manufacturing the equipment. The selection of the electrical PLC/CNC control system was based on the pre-approved supplier list of the Outokumpu Stainless engineering standards. Laserplus defined the customer requirements of the functional description for the laser cell control software together with the Outokumpu software engineering department. The functional description was also kept as a guideline during software commissioning and final function testing.
The automated specimen manufacturing system concept is designed with the location of the specimen tensile test workstation in mind, and it automatically provides an option for a robot installation. The robot can be located next to the sorting table, which then would work also as intermediate specimen storage. The purpose of the robot is to serve either the sorting table alone or closely to the ASMS located tensile test workstation.
Information and test material flow
Figure 3 shows how the ASMS information management system is integrated into the plant production information system. The test sheets are received from different production lines to the entry section of the ASMS for special pallets, and data is already available in the product data server. By identifying the test sheet from the barcode the set up data is downloaded from product data served to the laser cell control system. When the test sheet processing is completed the specimen feedback data is sent back to the product data server. The test specimen data is available for the quality assurance personnel for material tests. Consequently the material certificate can be issued.
Integrated laser automation
The functionality is implemented with six servo-driven axes. The PLC controls drives and movement sequences together with the CNC controller. The operator operates the ASMS through the HMI user interface screens. SQL server is connected via LAN to the plant production database. The laser cell control PC coordinates the PLC, CNC (laser cutting), laser marking, SQL database, and HMI systems within the ASMS. As a final result each laser marked and cut specimen is tracked individually and feedback is sent to the plant production database.
Laser equipment
Several different laser source types are available on the market for various applications. The ASMS is designed for 24/7 operations. The compact CO2 slab laser was selected for the cutting application because of the high demand for beam quality, operation reliability, and space requirements. The laser beam delivery optics transfers the beam to two cutting heads. The selection of the used cutting head is based on the material thickness, which varies from 0.5mm to 12mm.
A diode-pumped Nd:YAG laser was selected for the stainless steel marking. Laserplus Oy equipped the marking head with a specially made marking cover to keep the beam inside the cover for safety reasons.
Successful start-up
Start-up was successfully completed a year ago and the line is currently in production as a part of the Outokumpu Stainless Tornio quality assurance process. The line is connected to the manufacturing process network and produces the test samples based on the customer database requirements. The operator interference for the automated system is only three hours in an eight-hour shift.
Rainer Nurkkala ([email protected]) is sales manager, laser processing systems for Laserplus Oy, Hämeenlinna, Finland.


